SQL*Plus is the most commonly used command line tool for the Oracle database. This tool uses the Oracle Call Interface (OCI) libraries and APIs to connect to the database. The SQL*Plus comes in two distributions. First, it is included with the full Oracle Database Server and full Oracle Database Client, which is available through
Oracle Software Delivery Cloud. Second, SQL*Plus is an optional package of the
Oracle instant client distribution that can be downloaded and installed along with the Oracle instant client. The Oracle instant client typically has a newer version of SQL*Plus that the full client. However, two important things not included with the Oracle instant client include a JDK or the orapki command for certificate and wallet management. Fortunately, there are options for working around these limitations as my blog on
the missing orapki tool reveals.
Install SQL*Plus Instant Client
2. Extract the Oracle Instant into your preferred path. In my lab, I extracted it into "C:\u01\app\instantclient_23_7"
3. Extract the SQL*Plus Package into the same path as the previous step
Install SQL*Plus Full Client
2. Extract the the full database client zip file (V1045016-01.zip for Windows) into the desired location. In my lab, I extracted the full database client into "C:\u01\app\fullcient_23.5"
3. Run the setup tool in the <odb_client_base> directory. In my case, "C:\u01\app\fullcient_23.5\setup.exe"
4. Complete the setup process plugging in your preferred location for the client installation. Here are the screenshots from my setup where C:\u01\app is the Oracle base that I chose for my install.
Configure SQL*Plus Full Client For Entra ID Integration
1. Setup TLS client-side configuration for secure TLS encrypted connection to the Oracle database server. This requires that the SQL*Plus have a trust store loaded with the self-signed, privately signed or publicly signed certificate of the Oracle database server. If the Oracle database server certificate is signed by a public certificate authority, then your TNS entry or connect string for the oracle database server can use WALLET_LOCATION=SYSTEM because SQL*Plus is outsourcing the trust store to the trust store of the operating system of the host where SQL*Plus is running. Otherwise, a wallet containing the self-signed or privately signed certificate will need to be setup on this host and WALLET_LOCATION will be set to the full path to that wallet folder. For example, I use the following in my WALLET_LOCATION=C:\Users\DBClient\Desktop\tls. Note that this wallet will need auto-enable setup on the wallet so that SQL*Plus won't be prompted for the wallet password every time that SQL*Plus uses that wallet. Here is the sample invocation of orapki to enable auto_login on the wallet.
orapki wallet create -wallet $WALLET_ROOT/tls -pwd Oracle123 -auto_login
2. Add TNS entries into the "<odb_client_base>\network\admin\tnsnames.ora" configuration file for the Entra ID entabled Oracle database servers. The key distinction of Entra ID enabled entries are that they will have TLS configured requiring certificate DN matching and will include the Entra ID specific properties for identifying the SAML authentication flow, tenancy, client, and server IDs.
For both the instant and full clients, the tnsnames.ora is located in the <client_base>\network\admin folder.
In my case for instant client:
C:\u01\app\instantclient_23_7\network\admin\tnsnames.ora
In my case for full client:
C:\u01\app\fullclient_23.5\network\admin\tnsnames.ora
For your reference, here is a sample tnsname.ora entry to illustrate the requisite requirements for an Entra ID integrated connection string.
PDB1 =
(DESCRIPTION=
(ADDRESS=(PROTOCOL=TCPS)(HOST=hrdb.dbauthdemo.com)(PORT=2484))
(SECURITY=
(SSL_SERVER_DN_MATCH=TRUE)
(WALLET_LOCATION=SYSTEM)
(TOKEN_AUTH=AZURE_INTERACTIVE)
(TENANT_ID=7f4c6e3e-a1e0-43fe-14c5-c2f051a0a3a1)
(CLIENT_ID=e5124a85-ac3e-14a4-f2ca-1ad635cf781a)
(AZURE_DB_APP_ID_URI=https://dbauthdemo.com/16736175-ca41-8f33-af0d-4616ade17621)
)
(CONNECT_DATA=
(SERVER=DEDICATED)
(SERVICE_NAME=pdb1)
)
)
The key differences to note from a normal service description are the requirement for encrypted (e.g. TLS based TCPS) connection and Entra ID configuration.
The TLS encryption is required between the database client and server to securely pass the access token between the client and server. These settings are highlighted in blue.
The Entra ID configuration is highlighted in red where:
- TOKEN_AUTH specifies the SAML authentication flow, which is interactive in this case
- TENANT_ID specifies the ID of the Azure/Entra ID tenancy
- CLIENT_ID specifies the registered Entra ID web application for the database client
- AZURE_DB_APP_ID_URI specifies the URI of the registered Entra ID web application of the database server
Note that WALLET_LOCATION is set to SYSTEM. This means that the database server's TLS certificate is signed by a public certificate authority for which the operating system already contains a copy of the certificate authorities certificate chain in the operating system trust store. Therefore, a local wallet file containing the certificate authority's certificate chain or a self-signed certificate from the database server.
If the database server's certificate is self-signed or signed by a private certificate authority, then you will instead need to specify the path to the wallet that includes this information. Here is an example of what the WALLET_LOCATION would look like in the TNS entry if you had to specify a path to the wallet folder:
(WALLET_LOCATION=C:\Users\DBClient\Desktop\tls)
Also, in addition to specifying that the TLS certificate subject or one of the subject alternative name entries (SAN) must match the HOST value of the service description (e.g. SSL_SERVER_DN_MATCH=TRUE), you can also specify the full DN of the certificate with the following where the value of SSL_SERVER_CERT_DN highlighed in red would need to exactly match the subject of the server's certificate:
(SSL_SERVER_CERT_DN="CN=hrdb.dbauthdemo.com")
If you are not certain what the value of the server's certificate is, you can determine it from a UNIX/Linux system with the openssl tool. Here is a sample invocation for your reference:
$ echo | openssl s_client -connect hrdb.dbauthdemo.com:2484 2>&1 | openssl x509 -noout -text | egrep -i "DNS|subject"
Subject: CN=hrdb.dbauthdemo.com
Subject Public Key Info:
X509v3 Subject Alternative Name:
DNS:hrdb.dbauthdemo.com, DNS:www.hrdb.dbauthdemo.com
X509v3 Subject Key Identifier:
Use SQL*Plus With Entra ID Integration
1. Connect to a database server through a SQL prompt or command invocation of SQL*Plus. For example:
cd C:\u01\app\instantclient_23_7
.\sqlplus /nolog
SQL> conn /@pdb1
or alternatively with a full command invocation for the instant client install:
cd C:\u01\app\instantclient_23_7
.\sqlplus /@pdb1
or alternatively with a full command invocation for the full client install:
cd C:\u01\app\fullclient_23.5
.\bin\sqlplus /@pdb1
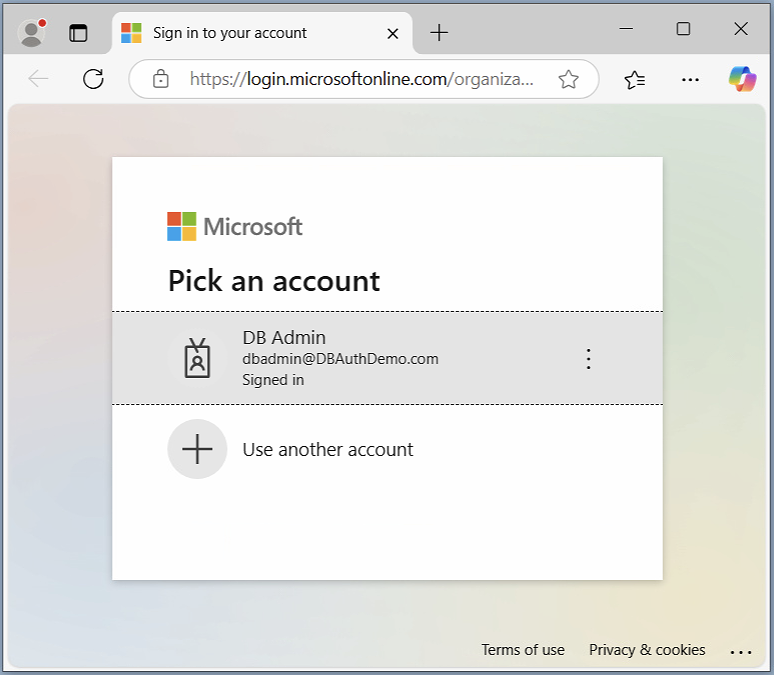
2. A web browser window will open to the Microsoft login. You select the desired account or add a new one. If you don’t already have an authenticated session, it will prompt you for your password followed by entering in the code from the Microsoft authenticator application.
3. Once successfully authenticated, the web browser window will indicate that authentication is complete and that you can close the web browser window.
At this point, the structure of database in SQL*Plus will be revealed in the Connections panel in accordance with the permissions granted to your user.
I hope you found this post helpful and informative.
Blessings!
Brad


1 comment:
Thank you Brad for these very useful blogs on Entra ID authentication. I was able to successfully test the connection with SQL*Plus however now I am getting ERROR: ORA-01017: invalid credential or not authorized; logon denied, I have not changed anything. Any suggestions ?
I have also followed your instructions for SQLDeveloper and I can connect intermittently, the connection is not always successful [java.lang.NullPointerException: Cannot invoke "java.util.Properties.getProperty(String)" because "this.sessionProperties" is null]. Could it be because the OS username is greater than 30 Characters (using email id with domain). Any suggestions would be helpful.
Thank you
Dali
Post a Comment