SQLcl is a powerful java (jdbc) based tool from Oracle that is designed to be functionally equivalent to the SQLPlus command line tool. SQLcl was introduced
in 2015 with version 4.1. Ten years later, SQLcl version 25.1 now supports cloud native integration with Microsoft Entra ID including multi-factor authentication for centralizing authentication, authorization, and user life cycle management of Oracle database users.
Setup SQLcl For Entra ID Integration
The setup of SQLcl and it's Entra ID integration is incredibly simple.
1. The first step is to
download SQLcl and extract the SQLcl zip file into your desired location. In my lab, that is in C:\u01\app where the resulting extracted path is C:\u01\app\sqlcl.
2. The next step is to start SQLcl with /nolog in the UNIX/Linux terminal or Windows command or powershell prompt of your choosing. Note that the default invocation of SQLcl uses the jdbc thick driver. Therefore, we specify the -thin argument to use the jdbc thin driver.
C:\u01\app\sqlcl>.\bin\sql -thin /nolog
3. Download and install the jdbc-azure libraries from maven at the following SQLcl command prompt:
SQL> sdk install jdbc-azure
If there is an error or for some reason SQLcl cannot connect to the Maven repo to download the dependencies you can build the
ojdbc-extensions yourself with
Apache Maven or alternatively, you can download a bundled set of the version 1.0.4 ojdbc-extensions from
here.
If you downloaded the bundled v1.0.4 set, you will extract them into the <sqlcl_base_directory>\lib directory. The resulting libraries should be located in <sqlcl_base_directory>\lib\sdks\jdbc-azure.
Use SQLcl With Entra ID Integration
Once SQLcl has been setup for Entra ID integration, the next step is to add Entra ID enabled Oracle databases to the configuration and use them.
0. If you want to specify a specific tnsnames.ora, set TNS_ADMIN to the folder of that file.
set TNS_ADMIN=SQLC:\u01\app\sqlcl\oracle\network\admin
1. Now that the requisite JDBC thin driver dependencies are satisfied, you can connect to a EntraID enabled database. Connect to the database through SQL prompt
or alternatively with a full command invocation:
C:\u01\app\sqlcl>.\bin\sql.exe -thin /@pdb1
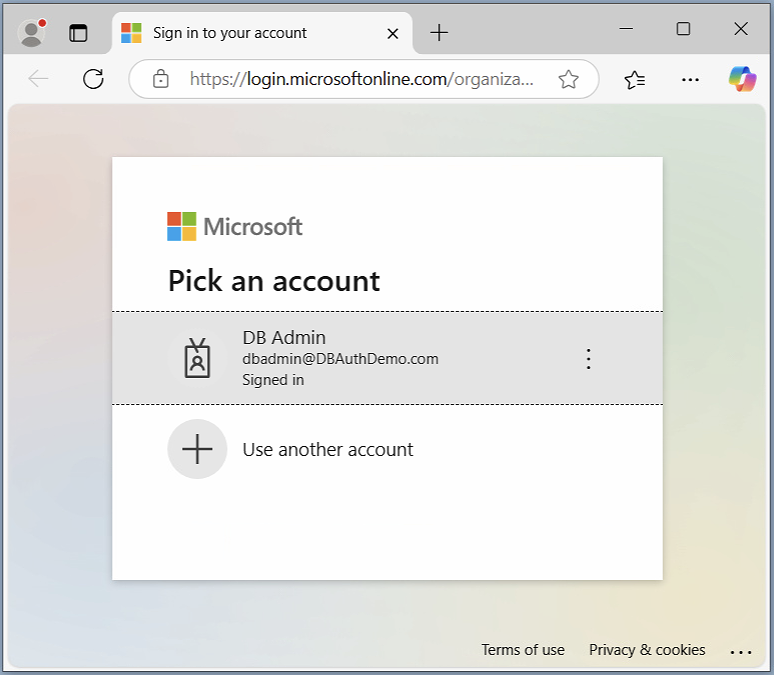
2. A web browser window will open to the Microsoft login. You select the desired account or add a new one. If you don’t already have an authenticated session, it will prompt you for your password followed by entering in the code from the Microsoft authenticator application.
3. Once successfully authenticated, the web browser window will indicate that authentication is complete and that you can close the web browser window.
At this point, the structure of database in SQLcl will be revealed in the Connections panel in accordance with the permissions granted to your user.
Troubleshooting
Note that the @pdb1 reads the service connection string from the tnsnames.ora from my system, which is located in my environment in C:\u01\app\oracle\network\admin. If you specify a service name that cannot be determined from the tnsnames.ora file, you will see an error similar to the following:
Connection failed
USER =
URL = jdbc:oracle:thin:@pdb1
Error Message = ORA-12154: Cannot connect to database. Could not find alias pdb1 in C:\u01\app\oracle\network\admin/tnsnames.ora.
https://docs.oracle.com/error-help/db/ora-12154/
For your reference, here is a sample tnsname.ora entry to illustrate the requisite requirements for an Entra ID integrated connection string.
PDB1 =
(DESCRIPTION=
(ADDRESS=(PROTOCOL=TCPS)(HOST=hrdb.dbauthdemo.com)(PORT=2484))
(SECURITY=
(SSL_SERVER_DN_MATCH=TRUE)
(WALLET_LOCATION=SYSTEM)
(TOKEN_AUTH=AZURE_INTERACTIVE)
(TENANT_ID=7f4c6e3e-a1e0-43fe-14c5-c2f051a0a3a1)
(CLIENT_ID=e5124a85-ac3e-14a4-f2ca-1ad635cf781a)
(AZURE_DB_APP_ID_URI=https://dbauthdemo.com/16736175-ca41-8f33-af0d-4616ade17621)
)
(CONNECT_DATA=
(SERVER=DEDICATED)
(SERVICE_NAME=pdb1)
)
)
The key differences to note from a normal service description are the requirement for encrypted (e.g. TLS based TCPS) connection and Entra ID configuration.
The TLS encryption is required between the database client and server to securely pass the access token between the client and server. These settings are highlighted in blue.
The Entra ID configuration is highlighted in red where:
- TOKEN_AUTH specifies the SAML authentication flow, which is interactive in this case
- TENANT_ID specifies the ID of the Azure/Entra ID tenancy
- CLIENT_ID specifies the registered Entra ID web application for the database client
- AZURE_DB_APP_ID_URI specifies the URI of the registered Entra ID web application of the database server
Note that WALLET_LOCATION is set to SYSTEM. This means that the database server's TLS certificate is signed by a public certificate authority for which the operating system already contains a copy of the certificate authorities certificate chain in the operating system trust store. Therefore, a local wallet file containing the certificate authority's certificate chain or a self-signed certificate from the database server.
If the database server's certificate is self-signed or signed by a private certificate authority, then you will instead need to specify the path to the wallet that includes this information. Here is an example of what the WALLET_LOCATION would look like in the TNS entry if you had to specify a path to the wallet folder:
(WALLET_LOCATION=C:\Users\DBClient\Desktop\tls)
Also, in addition to specifying that the TLS certificate subject or one of the subject alternative name entries (SAN) must match the HOST value of the service description (e.g. SSL_SERVER_DN_MATCH=TRUE), you can also specify the full DN of the certificate with the following where the value of SSL_SERVER_CERT_DN highlighed in red would need to exactly match the subject of the server's certificate:
(SSL_SERVER_CERT_DN="CN=hrdb.dbauthdemo.com")
If you are not certain what the value of the server's certificate is, you can determine it from a UNIX/Linux system with the openssl tool. Here is a sample invocation for your reference:
$ echo | openssl s_client -connect hrdb.dbauthdemo.com:2484 2>&1 | openssl x509 -noout -text | egrep -i "DNS|subject"
Subject: CN=hrdb.dbauthdemo.com
Subject Public Key Info:
X509v3 Subject Alternative Name:
DNS:hrdb.dbauthdemo.com, DNS:www.hrdb.dbauthdemo.com
X509v3 Subject Key Identifier:
Earlier in this post, I mentioned using the thin jdbc driver. It is also possible to use the thick driver as well. However, you first have to replace the <sqlcl_base>\lib\ojdbc11.jar library with the same file from an Oracle Database 23.5 client, which is located here <odb_client>\jdbc\lib\ojdbc11.jar. This appears to be unique to the SQLcl 25.1 version that will hopefully be resolved with a future update. Once the replacement of the ojdbc11.jar library file is complete, you can login with the thick version of the driver:
C:\u01\app\sqlcl>.\bin\sql.exe -thick /@pdb1
You will know that you need the ODB 23.5 client library if after running the above command, you see an error similar to the following:
Error Message = Incompatible version of libocijdbc[Jdbc:23702501, Jdbc-OCI:23502407
I hope you found this post helpful and informative.
Blessings!
Brad
Footnote:
Note from the
JDBC downloads page that JDBC-OCI (a.k.a. JDBC thick driver) support will be deprecated starting with ODB 24ai. See MOS note 2953282.1 for Deprecation Notice.

No comments:
Post a Comment